
After our last nail decal post got a lot of attention, we decided to explore some more fun ideas on ways to make your own nail decals and nail stencils to make manicures easy and festive. In this post, we'll explore how to make your own nail stencils at home and show you some fun DIY nail decals and ideas. And don't forget to review our DIY nail decal tips and tricks at the bottom of the page!

What you'll need:
- A cutting machine (if you have one! We'll share some other ways to make decals without a machine)
- Craftables Permanent Adhesive Vinyl
- Weeding tools- whatever you usually use to weed small details
- Squeegee
- Transfer tape
- Cutting mat
- Scissors
- Tweezers or weeding spatula (optional)
- Nailpolish and topcoat

Stripes
Using our sizing guide from our last nail post, create some stripes with your cutting machine. If you don't have a cutting machine you can still try this idea! Just get some Craftables Adhesive Vinyl and use scissors to cut your own stripes.
Stripes are one of the most versatile ideas for nail decals- you can use them as a stencil, they can help with your DIY french manicure, or you can leave them on the nails as decals.
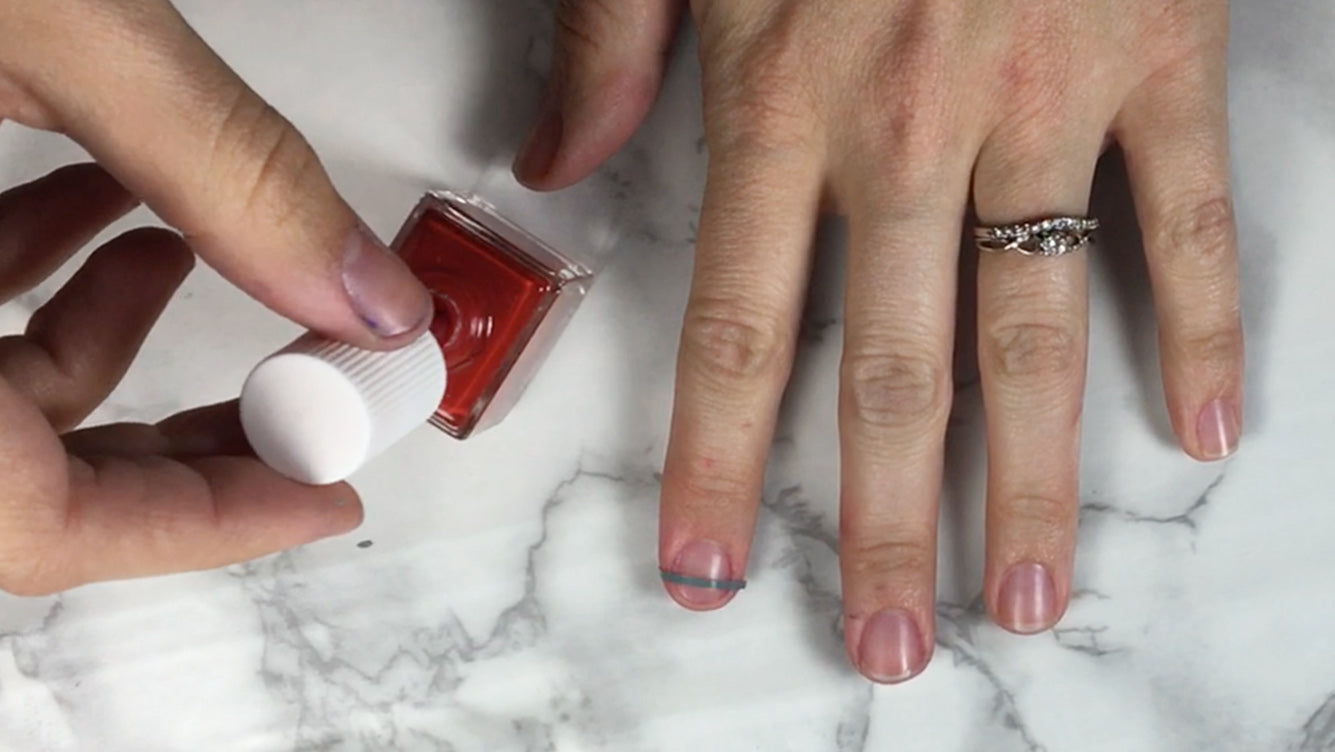

For the manicure above, we applied the stripe to a bare nail, painted over the stripe with polish, then removed the stripe while the polish was still wet.


For this game-ready manicure, we used the stripes themselves as nail stickers and then applied a yankees nail decal on top. Make sure to apply a clear coat on top!


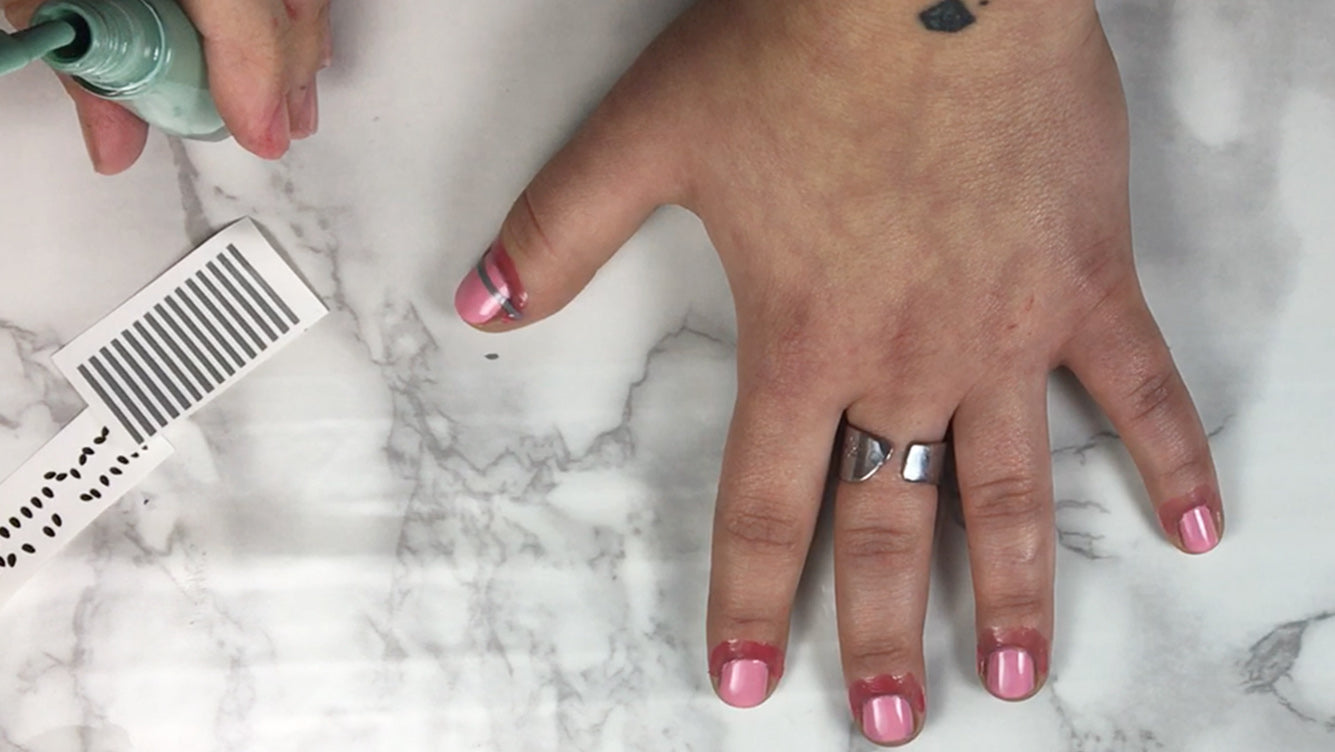
Stripes don't just have to be used horizontally! This manicure uses the stripes as stencils at an angle for a cute pastel manicure. Tip: make sure that the bottom coat is completely dry before applying and painting over the stencil.
French Manicure
We made the most perfect stencils for French manicures using Craftables vinyl. It was so easy!


This manicure is done the same way as the stripes above. Again, make sure to wait until the bottom coat (in case, the purple coat) is completely dry before applying the stencil and the French polish.
Shapes


For this manicure we used a triangle as a stencil, painted over it, and while the polish was wet we pulled the stencil off.


We used the same stencil concept for this funky fun manicure.


How cute is this watermelon manicure? We used the stripe as a stencil to paint the green cleanly on the pink polish. Then we used black vinyl to put the watermelon seeds on the pink. This manicure was definitely our favorite! (By the way- that pink stuff on the skin around the nail is latex nailpolish- it protects your skin from getting nailpolish on it if you're painting your nails with a stencil and it peels off very easily)


We cut out our game day logos with our craft cutter and used them as decals on dry nails. Tip: it's easier to apply decals with tweezers.
Don't forget, you can also use your craft cutter to cut out almost any shape you want! For more ideas, see our first blog post on nail decals.
Tips for how to cut and apply nail decals:
- Measure twice, cut once!
- Use a mat sticky enough to keep your vinyl flat and stuck to make sure your machine can easily cut your decals
- Use a sharp blade and make sure you have the correct settings
- Make sure your polish is 100% dry before applying any decals
- Use transfer tape to easily transfer your design to your nail
- Use a clear coat to ensure your decals stick and stay on your nail
- Use scrap instead of a new sheet, these decals are tiny!
- We tried these decals on a regular polish manicure as well as a acrylic nails and a gel manicure and they looked lovely and lasted on all!
- Tweezers can help you more easily apply the decal to your nail
If you don't have a craft cutter, you can still use vinyl to make nail decals and nail stencils.
There are many ways to get nail decal shapes in vinyl without a craft cutter:
- You can use a craft punch to cut out a shape from vinyl
- You can use scissors to cut stripes that you can use as decals or as stencils
- Use a hole punch in vinyl to create stencils for polka dots
- Or you can use a hole punch with vinyl and apply the dots you punch out to your nails
How long did the decals last?
- On nails without topcoat, they lasted up to 5 days
- On nails with topcoat, they lasted up to 8 days (longer than our manicure!)
- On toenails without topcoat, they lasted up to 3 weeks
- On toenails with topcoat, they lasted an entire month. If I didn't take my polish off they probably would have lasted longer!
For some free decal downloads, check out our free file library! All the decals we used in our last blog post are there.