Have you ever wanted to try and iron t-shirt vinyl on an unconventional surface but wondered if it would work? Did you ever have an idea for a cool project involving t-shirt vinyl and a surface that wasn't fabric and wondered if the vinyl would stick?
Today on the Craftables blog we're testing our HTV on many different surfaces so you don't have to!
Inspired by our post on applying HTV to a ceramic mug, we tried ironing heat transfer vinyl on glass, acrylic, leather, canvas, cardstock, doormats, metal, felt, carpet, clay, cork, granite, marble, tile, linoleum, mirror, acrylic and even a basketball! Stay tuned to see what works and what doesn't and any tips and tricks we have for ironing t-shirt vinyl on many different surfaces!

For this test I just used some scrap we had lying around from our Craftables Smooth HTV line along with a teflon sheet always to protect my iron and my test subjects. Because HTV involves, well, HEAT, I made sure to not choose to experiment with any surfaces that could melt. If you're doing the same tests at home, please be safe! Don't burn yourself! As a reminder, if you are using our HTV, we have a handy heat settings chart here. And if you need to revisit some basics on HTV please check out this post!
Throughout this post I'll be mentioning "standard HTV settings". By that I mean I'm using Craftables Smooth, my iron on 300-320 degrees Fahrenheit (or the cotton setting on my iron), pressing with medium pressure for around 12 seconds. And always, always, always waiting until my project cools for at least 20 seconds before peeling the carrier sheet off- that plastic gets HOT! Be careful!
HTV on Leather

How we ironed it: I tried this test with all the normal heat settings and it worked perfectly!
Result: The HTV is fully stuck to the leather and doesn't feel like it could easily peel off.
HTV on canvas

How we ironed it: If possible, a heat press would be the best way to iron on canvas because pressure is key on this surface. I used the normal heat settings to get the HTV to stick to the canvas but made sure to press with more force. An untreated canvas works best for this! If you are looking for instructions on how to iron HTV on canvas fabric (ie, not an art canvas but a canvas tote bag) you're in luck- HTV sticks wonderfully to canvas fabric, just be sure to wash the canvas to give it some texture and the HTV will stick wonderfully.
Result:The HTV stuck perfectly!
HTV on a mousepad

How we ironed it: I tried this test with all the normal heat settings and it worked perfectly!
Result:The HTV stuck perfectly!
HTV on a notebook

How we ironed it: I used all the normal heat settings and it worked perfectly!
Result: This test worked wonderfully! Because the cover of this notebook is essentially cardstock, I would recommend also trying the HTV on that too!
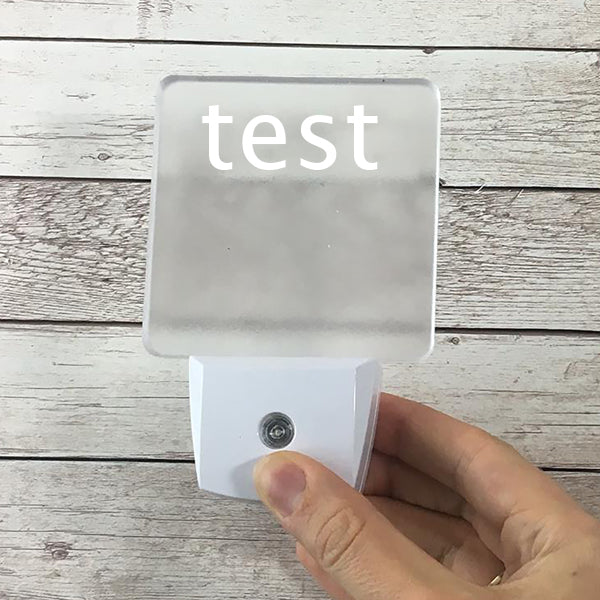
HTV on an acrylic blank

How we ironed it: For this project, I used a mini iron. Because plastic can melt, I hit it with heat for only 4-5 seconds at a time.
Result: I was so afraid of the plastic melting so I was super careful, but the HTV did stick to the acrylic! It was pretty heavy duty acrylic. If you're not sure how durable your acrylic is, do a little test. This experiment is a perfect example of why you need a teflon sheet- if the acrylic had melted, the melting plastic wouldn't have ruined my iron! This test did work, but depending on what you're ironing, we have no guarantee that the HTV will stick forever to the acrylic.
HTV on a metal lunchbox

How we ironed it: Because heat can travel quickly through metal, if you have plans of trying this at home please use a towel or oven mitt to hold your project. We used our tiny iron for this project. This project needed a bit more time and pressure.
Result: The HTV did stick! And it seems to be pretty durable. For all these tests I tried my best to peel back the HTV after applying it and it was fairly difficult to get this HTV off metal.
HTV on cork

How we ironed it: Using standard HTV settings and lots of pressure.
Result: Unfortunately this project was almost a complete bust! I think it could work great on a corkboard that has less give- like one with a frame. There was just too much give to these coasters so applying a good amount of pressure was a struggle.
HTV on glass

How we ironed it: For this project I used our mini iron. Again, this surface will transfer heat to your hands so many sure if you need to grip or hold your project, make sure to hold it with a towel or oven mitt. I used the normal heat settings to get my HTV to stick to glass.
Result: My carrier sheet was easy to peel up and the HTV stuck so nicely! A note on this project- the HTV may feel permanent but if you're applying this to a glass that goes through the dishwasher or for a project that will be exposed to steam or heat, the HTV will peel off.
HTV on wood

How we ironed it: This worked great with the standard HTV settings! I've read that HTV sticks to wood better if you treat the wood first. I used untreated wood and had no problems!
Result: The HTV stuck wonderfully to the wood! If you are attempting this project on very smooth wood, treat your surface first with stain or paint or polycrylic to give your HTV something to grip to.
HTV on wood flooring- matte finish

How we ironed it: using the standard HTV settings
Result: The HTV stuck! For a more permanent solution I would recommend spraying a protective epoxy or polycrylic topcoat to keep your HTV stuck to wood.
HTV on composite wood flooring- glossy finish

How we ironed it: using the standard HTV settings. After a couple minutes, I smelt a strange smell- probably the topcoat burning off- so I stopped ironing right then!
Result: Unfortunately this did not work! The finish was too glossy for the wood to stick. Sanding it down first probably would have helped, but regardless, I would not recommend breathing in that chemical-y gloss smell.
HTV on mirror

How we ironed it: I wasn't sure if the iron would melt the mirror so I only applied heat 5-7 seconds at a time. I used my mini iron for this because I didn't want to risk melting the plastic handle with my larger iron.
Result: I wouldn't say that this experiment was a success- the surface of the mirror was just so slick. This could work better with a thicker HTV material like glitter or flock and a chunkier HTV design.
HTV on carpet

How we ironed it: I was terrified that my iron would melt my carpet sample. After applying heat for about 5 seconds, I realized that my carpet was melting.
Result: I melted my carpet sample, but in the process the HTV melted into the carpet and now they're stuck together forever! I bet this sample was acrylic fiber because of how quickly it melted. Not all carpet is acrylic, so if you're looking to apply HTV to carpet and are feeling disappointed, don't lose hope- just scroll down! Again, this is a perfect example of why a teflon sheet is essential when using HTV. You never know what's going to happen and it's always better to play it safe!
HTV on carpet round II

How we ironed it: Based on how the first round went, I was even more hesitant to apply a hot iron to a possibly very melty carpet. I applied heat at first 2 seconds at a time, and once I realized my carpet wasn't going to melt (yay!) I applied heat for about 8 more seconds.
Result: Wow, I can't believe that the HTV stuck to this shaggy carpet! My guess is that the carpet is polyester which is why it worked. The iron and pressure really weighed down and flattened the pile of the rug so it lost its fluffiness, and honestly it looks really strange! But it worked!
HTV on linoleum

How we ironed it: I used the standard HTV settings and I think one more second and the linoleum would have been a bit too melty for my comfort.
Result: It works so great! The linoleum got just squishy enough to kind of absorb the HTV, so I know that the HTV is stuck on there tight. I even tried to peel up the HTV with my weeding tool and it was impossible to peel the vinyl off. This would be an amazing way to recycle some old linoleum!
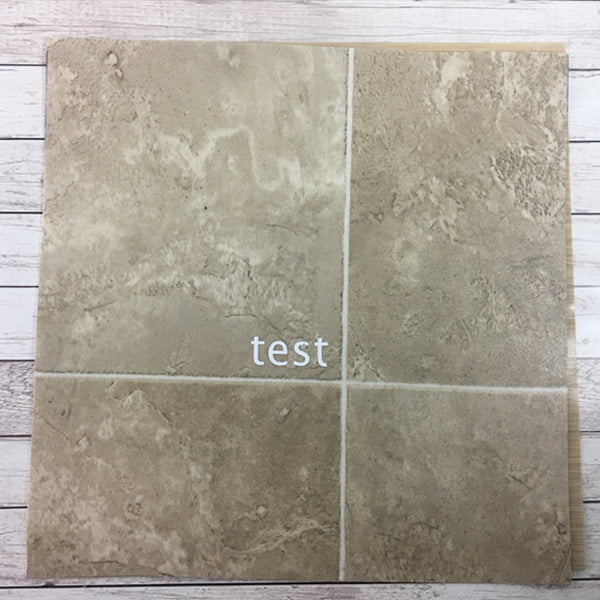
HTV on ceramic tile

How we ironed it: using the standard HTV settings
Result: The HTV did stick to the tile! This tile had a little bit of texture which I think added the perfect amount of grip. That grip makes it easier for the HTV to stick. Because some tiles seem to always have a powdery feel to them, I made sure to wipe the dust off the tile before applying the HTV. The HTV did stick nicely but it didn't feel as though the HTV would stick permanently.
HTV on granite tile

How we ironed it: using the standard HTV settings
Result: Unfortunately this did not work! The tile we were working with was very polished. I think this would have worked if the tile wasn't polished because again, the HTV needs something to grip to. As you can see, I couldn't even peel up the carrier sheet- the HTV was not sticking at all.
HTV on a doormat

How we ironed it: I wasn't sure if the iron would melt the mat so I only applied heat 5-7 seconds at a time using my mini iron. This mat is made of polypropylene, which has a melting point of 320 degrees Fahrenheit, so I made sure my iron wasn't quite that hot.
Result: The vinyl looks phenomenal on this doormat! Just like the linoleum, I got the mat hot enough that both the mat and the HTV got sticky enough to permanently bind to each other.
HTV on a basketball

How we ironed it: I used my mini iron and the standard HTV settings.
Result: It did not work! I think the texture in the basketball was too bumpy for the HTV to get a good grip.
As it turns out, HTV can easily be ironed on way more than just fabric! What surfaces are you looking forward to trying?
