How to use Inkjet Printable HTV
Hello everyone! Today on the blog I'm excited to share with you this super cute project and tutorial for how to use inkjet printable HTV.
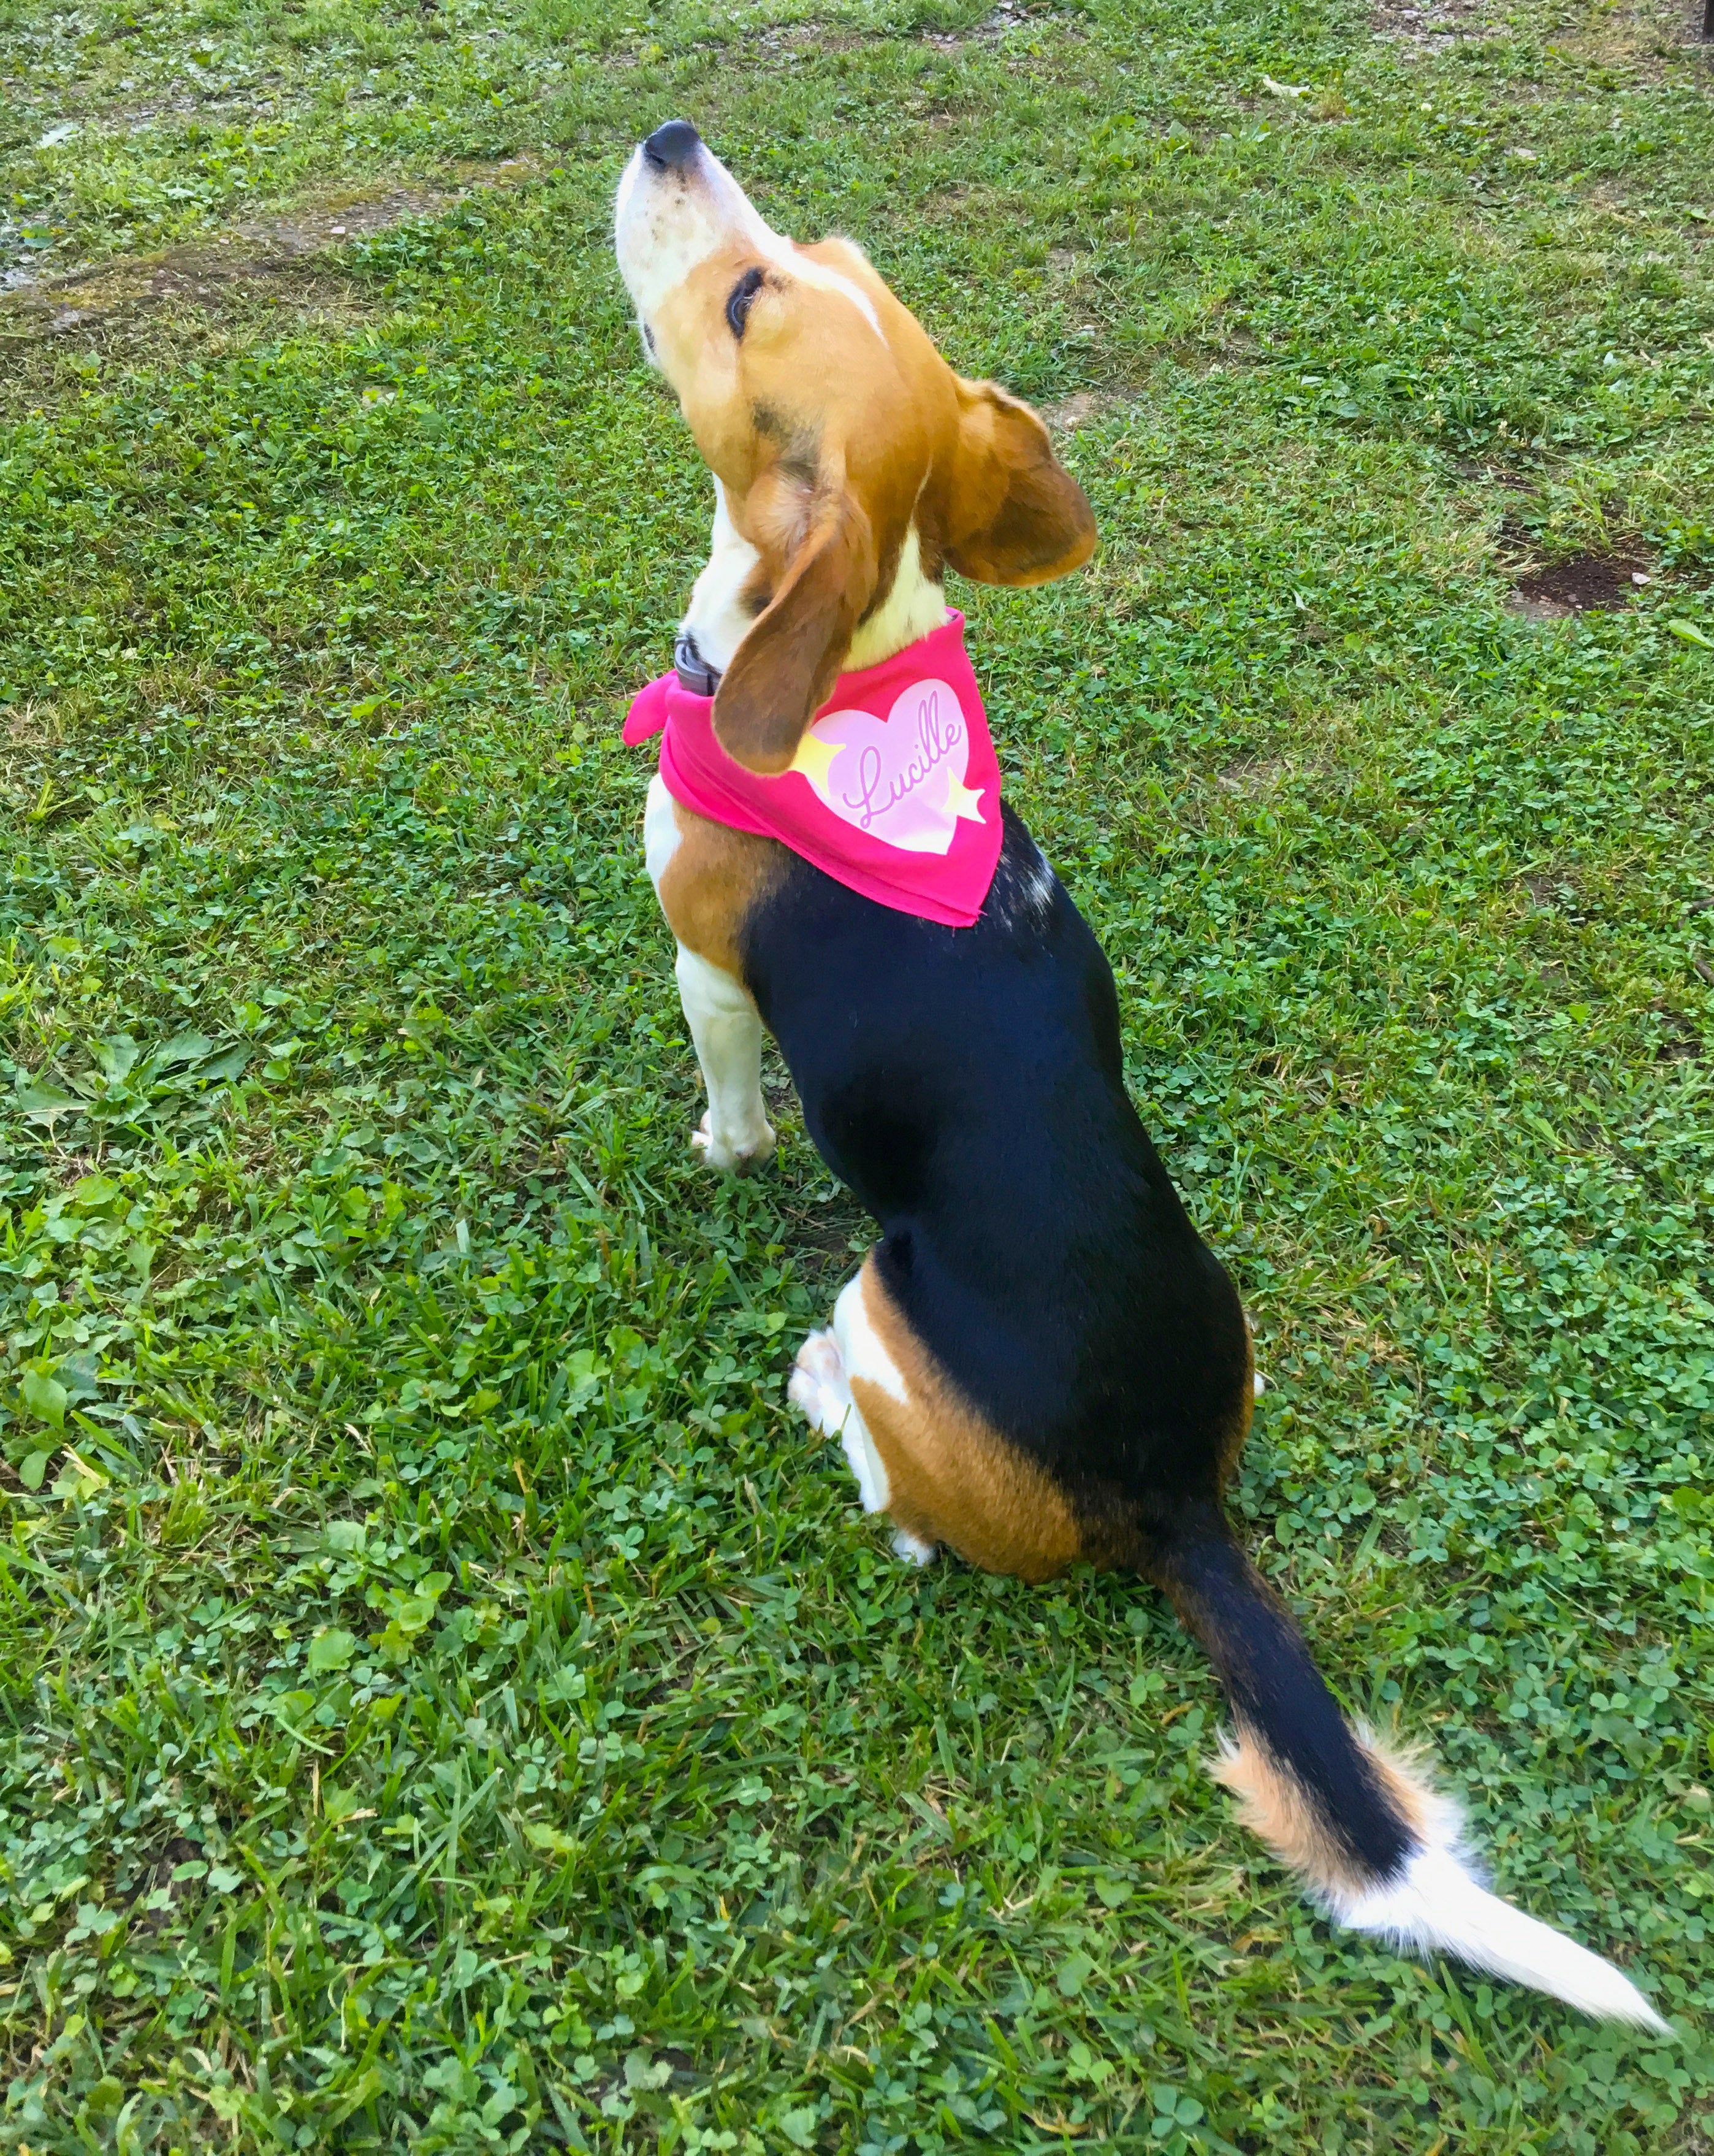
So many people want to try this material but are intimidated by the extra step. But I'm here to tell you that it's so easy and it really elevates your crafting potential, so why not give it a try? Today I'm making a custom bandana for my pooch Lucille! I decided to make her a bandana because she looks very cute in bandanas! Lucille sometimes makes cameos on our social media. For more on Lucille and other shop dogs that keep us company during the work day, check out this facebook live video.

What you'll need:
- an inkjet printer
- inkjet printable HTV- today we're using dark
- an iron or heat press
- a teflon sheet
- weeding tools
- something cotton or polyester or a blend to iron your htv to
- your favorite craft cutter
What is the difference between dark and light inkjet printable?
I get this question quite frequently. Light inkjet printable HTV is for white fabric only and dark inkjet printable HTV is for any other color of fabric. There's a larger difference between the vinyl too- dark inkjet printable requires a flush cut and your print your image as is. Light inkjet printable htv requires you to mirror your image before you cut and also to leave an offset border (a small white border) around your design. You iron light inkjet printable face down and dark inkjet printable face up.
If you're still not sure which to choose, the dark can be applied to light too! But the light cannot be applied to any color besides white.
Today we're using dark inkjet printable because the bandana we're using is hot pink.
Step 1
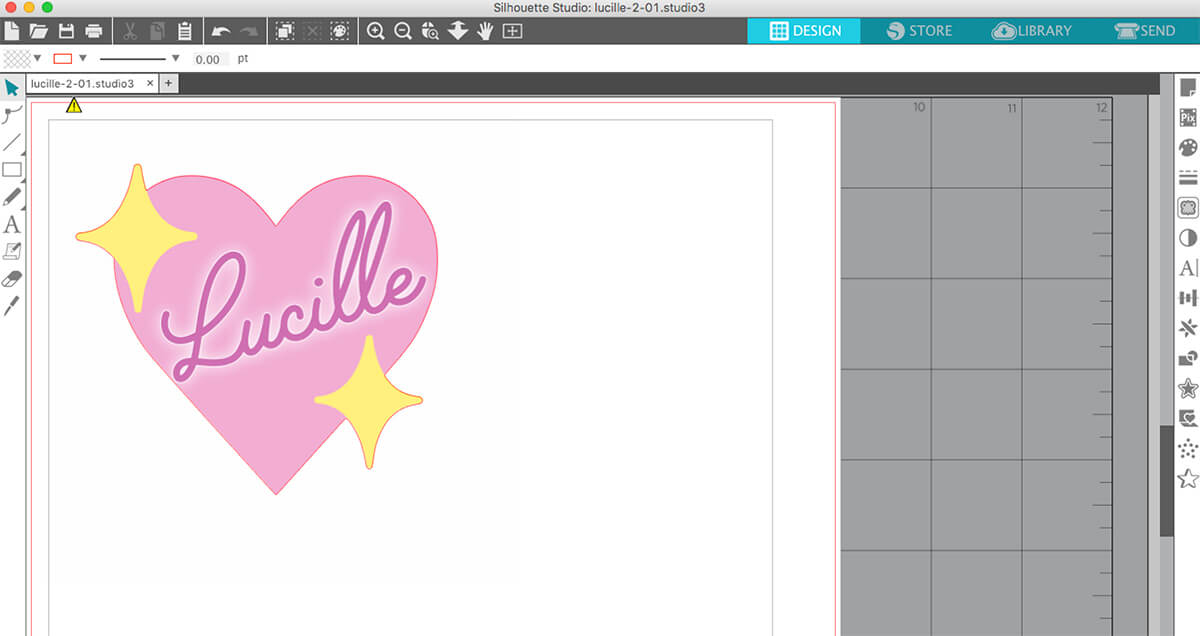
Preheat your iron to 320 degrees F. Prepare your image by adding registration marks and add a cut line flush around your design- do not leave a white border. Press print.
Step 2
Once your image has printed, wait for the ink to dry (I waited 5 minutes!) and place your design onto your cutting mat with the design side up.

Step 3
Load your printed design into your cutter and cut your image. Your machine will know to check for the registration marks. For more on this step, see this video.

Step 4
Once your design has been cut, weed your design. Make sure your iron is fully heated to 320 degrees F and preheat your fabric. Peel the carrier sheet (the grid paper) off of your decal.

Step 5
Place your design face up on your project and place a teflon sheet between your design and your iron. Press for 25 seconds.

Step 6
Wait 1:00 before peeling up the teflon sheet and enjoy!

How do I care for my inkjet printable HTV project?
- This vinyl is a bit more temperamental than regular HTV. Here are some tips to get your inkjet printable HTV to last:
- Wait a full 24 hours before washing the project- you need to wait at least that long to allow the adhesive to set to the fabric.
- Wash it inside out with cold water only and a gentle cycle.
- Don't use any fabric softener.
- Do not throw your project in the dryer.
- Hang or lay flat to dry.
What else can inkjet printable HTV be used for?
The possibilities are endless! You can print a photograph and make a t-shirt, sweatshirt or blanket. Instead of layering HTV, you can print whatever image you want (think unicorn, mermaid, your children's or pet's names, etc!) onto the htv and you only have to iron once! We also sell inkjet printable vinyl which is fun for making labels, stickers, customizing mugs, tumblers, wine glasses, etc! What are you making with inkjet printable? Make sure to share it with us on social media and our facebook group!